How to Use Golem Network Providers to Run AI Models
In this tutorial, we will show you how to use the ollama qwen2 model on the Golem Network. If you want to experiment with another model, we'll also guide you on how to create an image with your desired ollama model. Additionally, we'll explain the critical elements of the requestor script so you can tailor it to your specific needs.
This tutorial is divided into four parts:
- Prerequisites: Covers installing and running Yagna, and acquiring necessary tokens.
- Using the Model on a Golem Provider: Demonstrates how to run the requestor script to interact with an AI model running on a GPU provider.
- Preparing the Image: Explains how to create a custom Golem image containing your chosen AI model.
- Understanding the Requestor Script: Provides an in-depth look at the structure and key elements of the requestor script.
1. Prerequisites
For this tutorial, you need node.js, curl, or ollama CLI installed. For section 3 (building an image with a custom model), you need docker and gvmkit-build.
Install Yagna
You need the Yagna service installed and running. If you don't already have it, follow these steps:
On Linux/MacOS, you can install it using our installation script:
curl -sSf https://join.golem.network/as-requestor | bash -You might be asked to modify your PATH afterward.
Start the Yagna service
Open a terminal (command line window) and define the app-key that will allow our script to use the Yagna API:
export YAGNA_AUTOCONF_APPKEY=try_golemThen start the yagna service:
yagna service runGet GLM and POL tokens
Requesting tasks on the Golem Network requires GLM tokens. This example is configured to run on GPU Providers, available on the Polygon mainnet, where you need actual GLM tokens. However, there's an option to run examples on a test network, where you can use test GLM (explained further in this tutorial). The last section also covers updating the script to use CPU providers or the testnet.
Acquiring GLM:
If you don't have GLM or POL tokens to cover transaction fees, the recommended way is to use our GLM onboarding portal from within Yagna. Simply run the following command, open the provided link, and follow the instructions:
yagna payment fund --network=polygonIf you already have GLM and POL tokens, you can transfer them to your Yagna wallet from your preferred crypto wallet. To find your Yagna wallet address, run:
yagna id showYou can also visit our GLM Onboarding portal to get the necessary tokens and transfer them to your Yagna wallet later.
To test the script on the testnet with CPU providers (we don't currently offer GPU providers on the testnet), you need to make changes to the script, as described in the last section.
To get test funds for the testnet, open another terminal and run:
yagna payment fundThis will top up your account with test GLM tokens, which can only be used on the testnet.
2. Running AI Models on the Golem Network
Create a new Node.js project and install the Golem SDK:
mkdir golem-ai
cd golem-ai
npm init
npm install @golem-sdk/golem-js
npm install @golem-sdk/pino-logger
Note: This script requires Node.js version 18.0.0 or higher.
Create a file named requestor.mjs and copy the following content into it. This code will engage a provider with a price limit of 2 GLM per hour, deploy the image with ollama serving the qwen:0.5b model, and make it available on port 11434.
import { GolemNetwork } from '@golem-sdk/golem-js'
import { pinoPrettyLogger } from '@golem-sdk/pino-logger'
import { clearInterval } from 'node:timers'

/**
 * Utility function to wait for a certain condition to be met or abort when needed
 *
 * @param {Function} check The callback to use to verify if the condition is met
 * @param {AbortSignal} abortSignal The signal to observe and cancel waiting if raised
 *
 * @return {Promise<void>}
 */
const waitFor = async (check, abortSignal) => {
  let verifyInterval

  const verify = new Promise((resolve) => {
    verifyInterval = setInterval(async () => {
      if (abortSignal.aborted) {
        resolve()
      }

      if (await check()) {
        resolve()
      }
    }, 3 * 1000)
  })

  return verify.finally(() => {
    clearInterval(verifyInterval)
  })
}

/**
 * Helper function breaking stdout/sterr multiline strings into separate lines
 *
 * @param {String} multiLineStr
 *
 * @return {String[]} Separate and trimmed lines
 */
const splitMultiline = (multiLineStr) => {
  return multiLineStr
    .split('\n')
    .filter((line) => !!line)
    .map((line) => line.trim())
}

const myProposalFilter = (proposal) => {
  /*
// This filter can be used to engage a provider we used previously.
// It should have the image cached so the deployment will be faster.
 if (proposal.provider.name == "<enter provider name here>") return true;
 else return false;
*/
  return true
}

const glm = new GolemNetwork({
  logger: pinoPrettyLogger({
    level: 'info',
  }),
  api: { key: 'try_golem' },
  payment: {
    driver: 'erc20',
    network: 'polygon',
  },
})

const controller = new AbortController()

let proxy = null
let rental = null
let isShuttingDown = 0
let serverOnProviderReady = false

try {
  // Establish a link with the Golem Network
  await glm.connect()

  // Prepare for user-initiated shutdown
  process.on('SIGINT', async function () {
    console.log(' Server shutdown was initiated by CTRL+C.')

    if (isShuttingDown > 1) {
      await new Promise((res) => setTimeout(res, 2 * 1000))
      return process.exit(1)
    }

    isShuttingDown++
    controller.abort('SIGINT received')

    await proxy?.close()
    await rental?.stopAndFinalize()
    await glm.disconnect()
  })

  const network = await glm.createNetwork({ ip: '192.168.7.0/24' })

  const order = {
    demand: {
      workload: {
        imageHash: '23ac8d8f54623ad414d70392e4e3b96da177911b0143339819ec1433', // ollama with qwen2:0.5b
        minMemGib: 8,
        capabilities: ['!exp:gpu', 'vpn'],
        runtime: { name: 'vm-nvidia' },
      },
    },
    market: {
      rentHours: 0.5,
      pricing: {
        model: 'linear',
        maxStartPrice: 0.0,
        maxCpuPerHourPrice: 0.0,
        maxEnvPerHourPrice: 2.0,
      },
      offerProposalFilter: myProposalFilter,
    },
    network,
  }

  rental = await glm.oneOf({ order }, controller)
  const exe = await rental.getExeUnit(controller)

  const PORT_ON_PROVIDER = 11434 // default port
  const PORT_ON_REQUESTOR = 11434 // will use the same outside

  console.log('Will start ollama on: ', exe.provider.name)

  const server = await exe.runAndStream(
    `sleep 1 && /usr/bin/ollama serve` // new image should have HOME=/root
  )

  server.stdout.subscribe((data) => {
    // Debugging purpose
    splitMultiline(data).map((line) => console.log('provider >>', line))
  })

  server.stderr.subscribe((data) => {
    // Debugging purpose
    splitMultiline(data).map((line) => console.log('provider !!', line)) // Once we see that the server has started to listen, we can continue

    if (data.toString().includes('Listening on [::]:11434')) {
      serverOnProviderReady = true
    }
  }) // Wait for the server running on the provider to be fully started

  await waitFor(() => serverOnProviderReady, controller.signal) // Create a proxy instance for that server

  proxy = exe.createTcpProxy(PORT_ON_PROVIDER)

  proxy.events.on('error', (error) =>
    console.error('TcpProxy reported an error:', error)
  ) // Start listening and expose the port on your requestor machine

  await proxy.listen(PORT_ON_REQUESTOR)
  console.log(`Server Proxy listen at http://localhost:${PORT_ON_REQUESTOR}`) // Keep the process running to the point where the server exits or the execution is aborted

  await waitFor(() => server.isFinished(), controller.signal)
} catch (err) {
  console.error('Failed to run the example', err)
} finally {
  await glm.disconnect()
}
To run it, use this command:
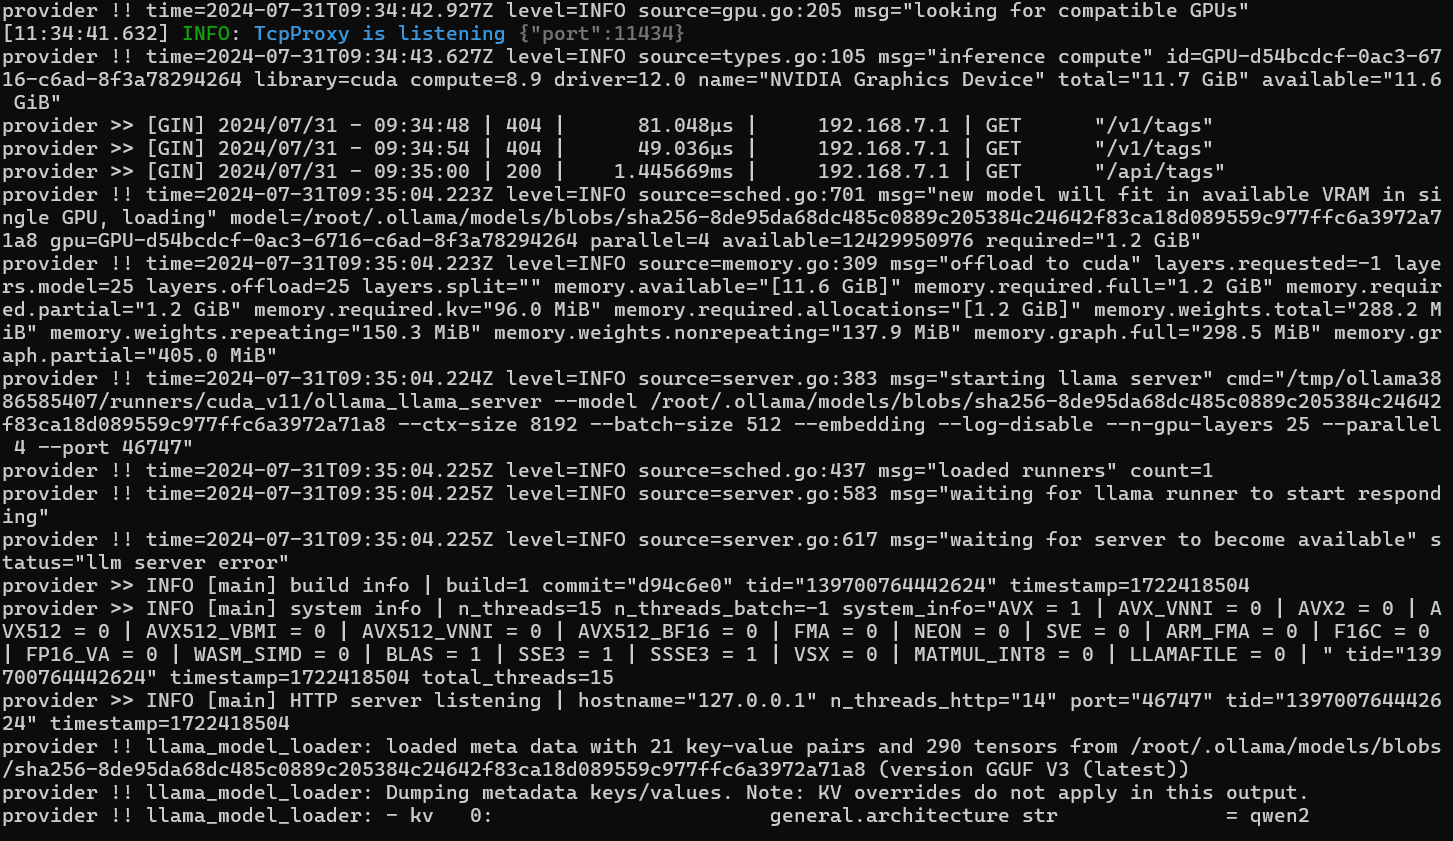
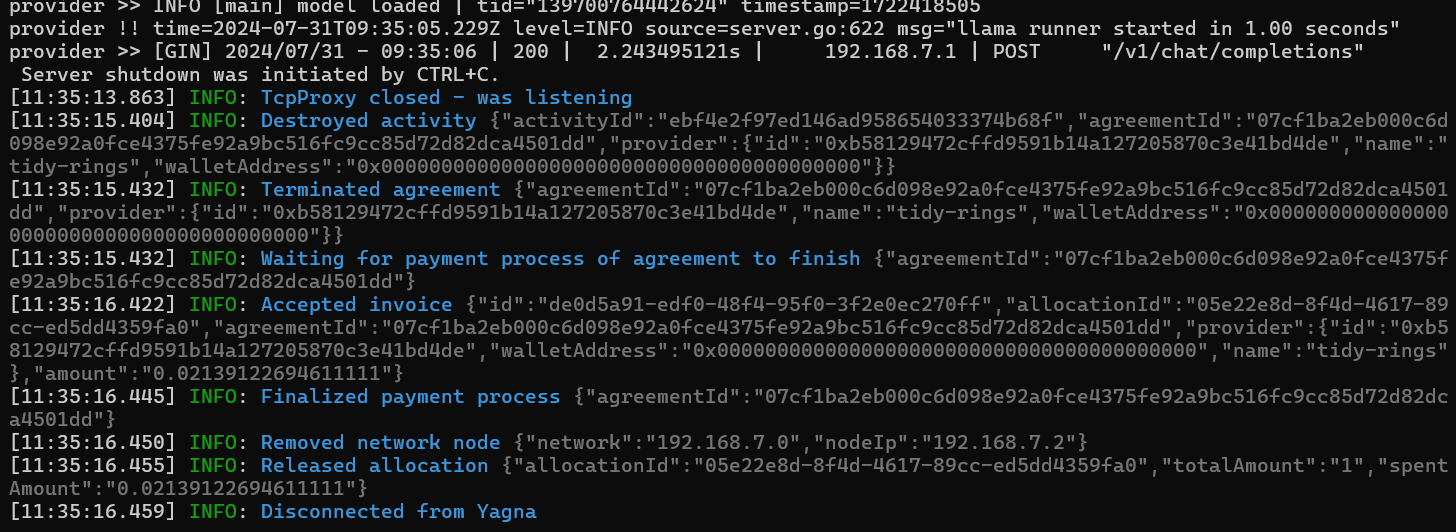
node requestor.mjsThe output should look like this:


Once it's running, you can interact with the model using the ollama CLI:
ollama run qwen:0.5bor using the REST API:
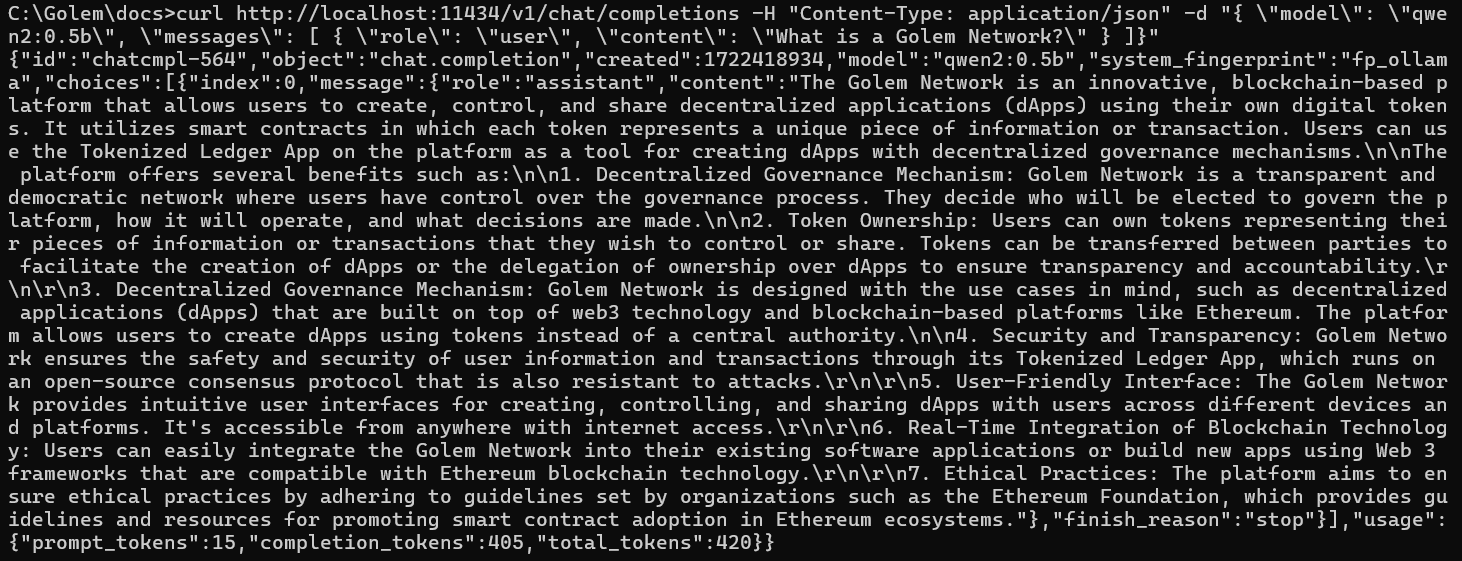
curl http://localhost:11434/v1/chat/completions -H "Content-Type: application/json" -d "{ \"model\": \"qwen2:0.5b\", \"messages\": [ { \"role\": \"user\", \"content\": \"What is the Golem Network?\" } ]}"Here's an example output:

Note: You cannot pull another model to the provider without requesting the outbound service from providers. The next section shows you how to create an image with another model so you can use it without needing the outbound feature.
3. Preparing the Image
This step requires Docker and the Golem gvmkit-build image conversion utility installed on your system.
If you don't have Docker installed, follow these instructions.
The gvmkit-build installation instructions are available here.
In this section, we'll show you how we prepared our example image. You can modify the Dockerfile to create your custom one.
Here's our Dockerfile:
FROM ollama/ollama
ENV HOME=/root
COPY ./models /root/.ollama/models
We started with the official ollama/ollama Docker image. We set the HOME variable to /root because we'll be acting as the root user on the remote machine. Then, we copy the model data from the ./model directory.
Since the docker build command copies data from the context where it's run, we had to copy the model to the directory where we build the image. The models are originally stored in $HOME/.ollama/models, where HOME is the user's home directory. To get the model there, we had to run ollama locally and pull the model to our PC using the commands ollama serve and ollama pull qwen2:0.5b.
Note: 05.b indicates the model version (the smallest one). Make sure you have enough space to pull the desired model.
If you don't have ollama installed, you can run the ollama/ollama image in Docker and execute the ollama pull qwen2:0.5b command within the container.
For instance, on Windows, you would use the following commands:
docker run -d -v .\models:/root/.ollama/models -p 11434:11434 --name ollama ollama/ollama
docker exec -it ollama ollama pull qwen2:0.5b
These commands run the container with the image and mount the local .\models\ folder as a volume for the directory where ollama stores pulled models. The second command executes the ollama pull command within the container.
Now, let's build the image:
docker build -t ollama:mytag .Once the image is built, convert it to the GVMI format:
gvmkit-build ollama:mytagand upload it to the Golem Registry:
gvmkit-build ollama:mytag --push --nologinNote: Uploading can take time, especially for large images.
In the gvmkit-build output, find the line:
Image link (for use in SDK): <imageHash>
Copy the imageHash - you'll need it in the next step.
4. Understanding the Script
Now that you have an image with your chosen model, you can test it on the Golem Network. We won't go through the whole script in this section, but we'll highlight the critical elements for running your model on a GPU provider.
Script Structure
The script follows the structure of a standard requestor script. We connect to glm (GolemNetwork), acquire an exeunit from a rental, and run the command ollama serve on the provider. In the Docker image, the ollama serve command is run automatically as the entry point. GVMI images currently don't support entry points. We'll start the ollama server on the provider and use its REST API to interact with the model. The command is executed using the runAndStream method so we can collect the output as a stream and print it to the terminal. The command on the provider is delayed by 1 second using sleep 1 to ensure we capture the entire output stream. We then monitor the output until the ollama server is running, and then we'll use a built-in proxy to expose the provider service on the desired port on our local machine. (If you try to run a proxy for a non-existent service, you will get a 400 error, so we need to make sure the service is up and running before we start the proxy).
Once the proxy is running, we can use the local ollama CLI or curl to interact with the model. We can check if our model is available by running curl http://localhost:11434/api/tags.
For the example image, the output should look like this:

If you run the script without any changes, you won't see your model there. You need to tell the provider to use your new image.
Selecting Providers with GPU or CPU
Look at this section of the code:
demand: {
  workload: {
    imageHash: '23ac8d8f54623ad414d70392e4e3b96da177911b0143339819ec1433', // ollama with qwen2:0.5b
    minMemGib: 8,
    capabilities: ['!exp:gpu', 'vpn'],
    runtime: { name: "vm-nvidia" },
  },
},
Replace the original image hash with the one returned by gvmkit-build in the previous step. Let's look at the other workload options:
To request a provider with a GPU, you need to include the following options:
capabilities: ['!exp:gpu', 'vpn'],
runtime: { name: "vm-nvidia" },
If you want to run a test on a CPU, you need to remove these lines or replace them with:
runtime: { name: "vm" },To run this example on CPU providers, you should also update the pricing filter. Please scroll down for details.
If your model is large, you might need to request a provider with more than 8 GB of memory by adjusting the minMemGib value.
Selecting Providers and Setting the Price Limit
When running your task on the mainnet, pay attention to this section:
market: {
  rentHours: 0.5,
  pricing: {
    model: 'linear',
    maxStartPrice: 0.0,
    maxCpuPerHourPrice: 0.0,
    maxEnvPerHourPrice: 2.0,
  },
  offerProposalFilter: myProposalFilter,
},
Here, we define that we're renting resources for a maximum of 0.5 hours (you can terminate earlier by pressing Ctrl+C) and set the maximum price you're willing to pay. If there are no GPU providers available within your price limit (2 GLM per hour in the example), you can either increase your budget or use CPU providers, which are generally cheaper.
If you decide to run the model on a CPU provider, please update the pricing filter: pricing: { model: 'linear', maxStartPrice: 0.0, maxCpuPerHourPrice: 0.0, maxEnvPerHourPrice: 2.0, },
While 2.0 GLM for EnvPerHour is a lot for a CPU provider, 0.0 GLM for CpuPerHour is not enough. You will probably not receive any offers without modifying the pricing filter.
The myProposalFilter can be used to filter the providers you engage with. If your model is large, your image will also be large, and it might take some time for providers to download it from the registry. For a 7 GB image, the download can take up to 10 minutes, depending on the provider's bandwidth. Therefore, once you engage a provider, you might prefer to select the same one for subsequent tasks. If the provider has your image cached, the deployment will be significantly faster.
To find the provider you used, look for a line like Will start ollama on: <provider name> in the script output and update the myProposalFilter accordingly.
Working on the Mainnet
Finally, let's examine the GolemNetwork options:
const glm = new GolemNetwork({
  logger: pinoPrettyLogger({
    level: 'info',
  }),
  api: { key: 'try_golem' },
  payment: {
    driver: 'erc20',
    network: 'polygon',
  },
})
The api: { key: 'try_golem' } object sets the app-key configured during the yagna startup. You can find instructions on setting a unique value in the documentation.
The payment options:
payment: {
  driver: 'erc20',
  network: 'polygon',
},
This section indicates you want your task to run on the mainnet - the part of the Golem Network where you pay with GLM (and where GPU providers are available). If you'd like to test your scripts on low-performance CPU providers, comment out this section, and your task will search for providers on the testnet.
Remember to modify the demand options to request CPU providers if you do this.
Conclusion
That concludes our tutorial on using AI models on the Golem Network. If you encounter any problems with the Golem Network, Yagna, or the requestor scripts, please reach out to us on our Discord channel.
Was this helpful?